
Booking a Room
Booking a room is easy. There are two ways to book a conference room.
Click the "Make a Reservation" Button
Click the "Make a Reservation" button will prompt a modal window with reservation details that you can fill in.
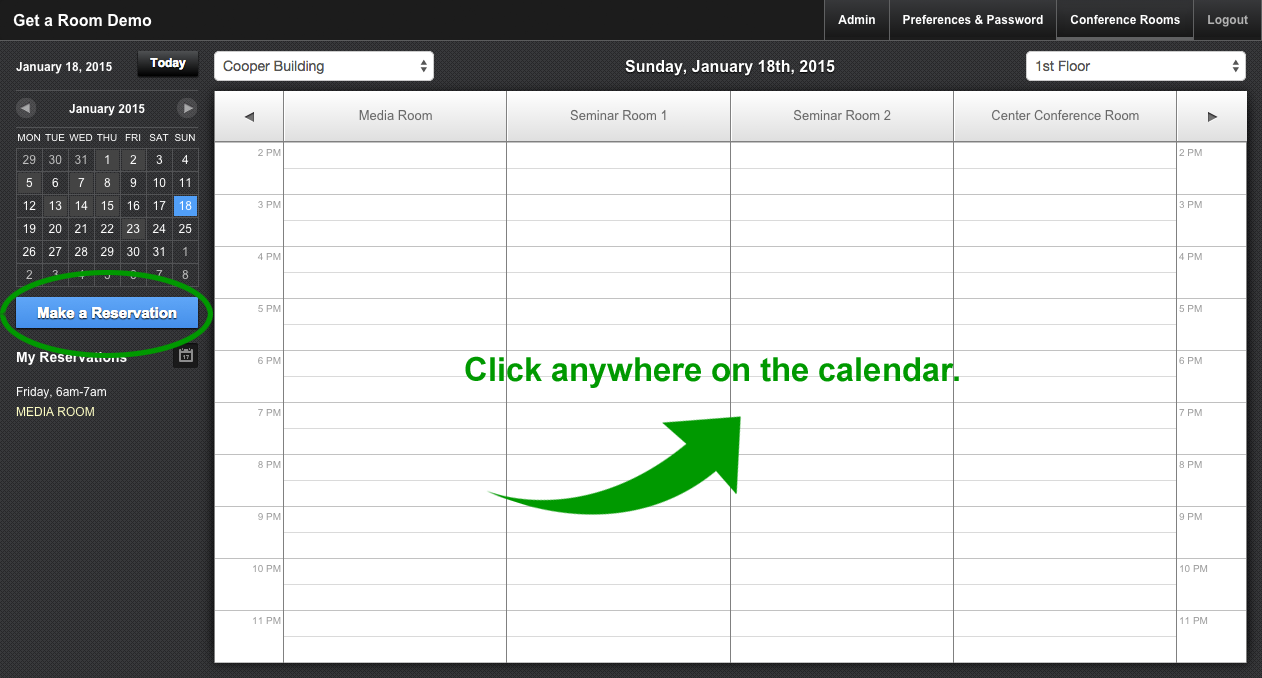
Click Anywhere on the Calendar
Clicking anywhere on the calendar will prompt a modal window with reservation details that you can edit. However it will also pre-populate the modal with information from where on the calendar you clicked such as the room and time.
Navigating the Calendar Interface
The Datepicker
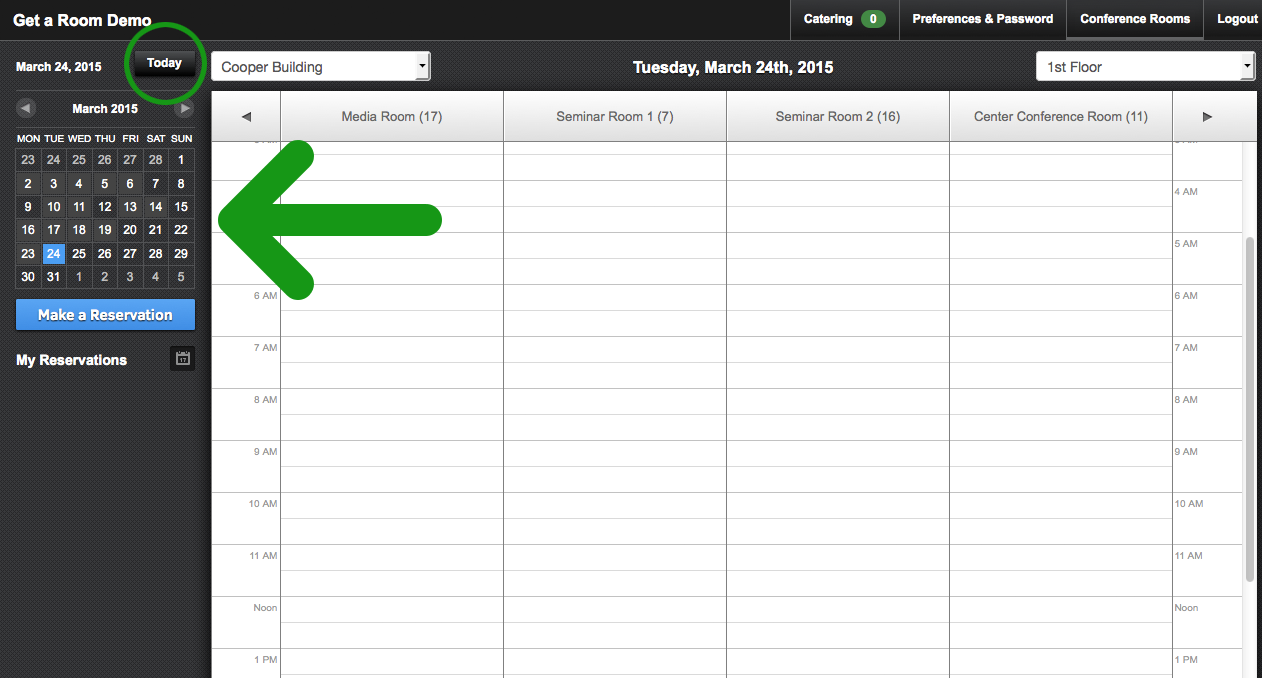
You can navigate to any date with the Datepicker. Use the arrow keys to the left and the right of the Month and Year to navigate months and click on any day to see the day view for that day. Simply click the "Today" button (circled in the below screenshot) to go to today's day view.
Navigating Rooms
The calendar interface is organized around rooms and the rooms run in columns in the calendar interface. The number of rooms you see in your calendar interface is dependent on the size of your screen. For smaller screens you might see anywhere from four to five screens. On larger screens you may see up to 10. To navigate to rooms that are not in view on your screen simply use the arrow keys to the right and left of the room names as illustrated below.
Switching Buildings or Floors
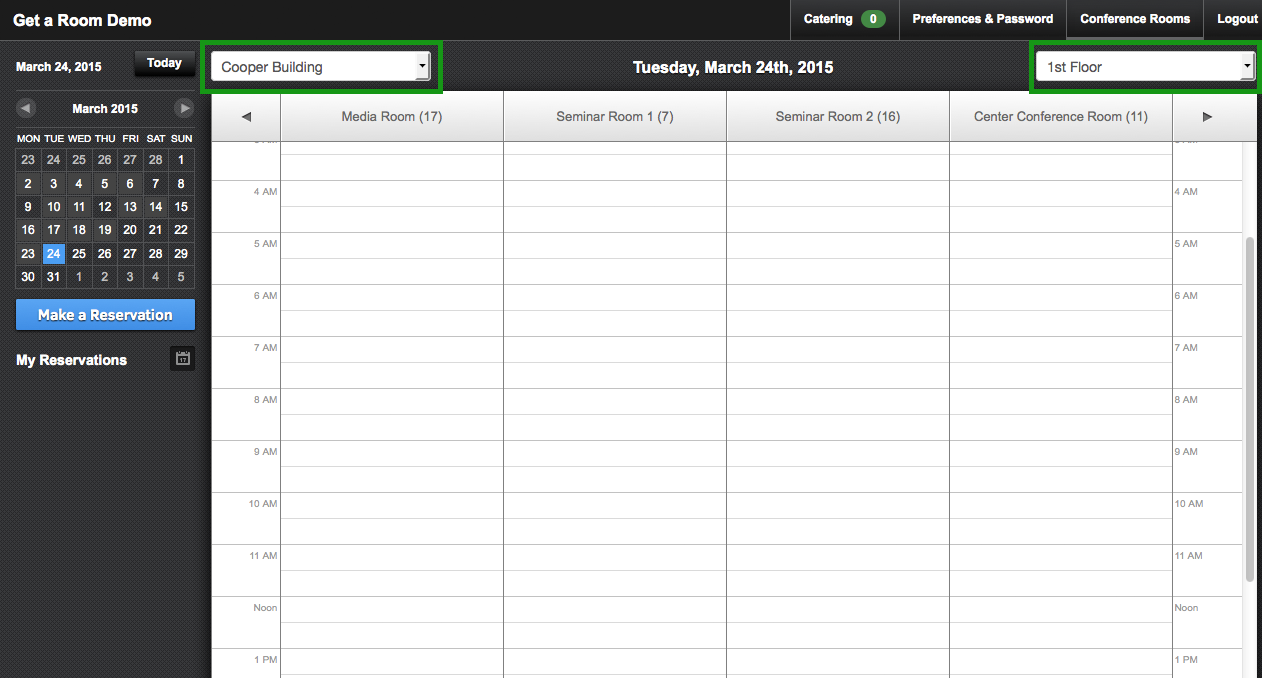
If you have conference rooms in multiple buildings or floors/spaces it's easy to switch in between. You can switch buildings by selecting the building using the drop-down to the left of the main calendar date. You can switch floors/spaces using the drop-down to the right of the main calendar date (both illustrated in this screenshot).
Shortcuts
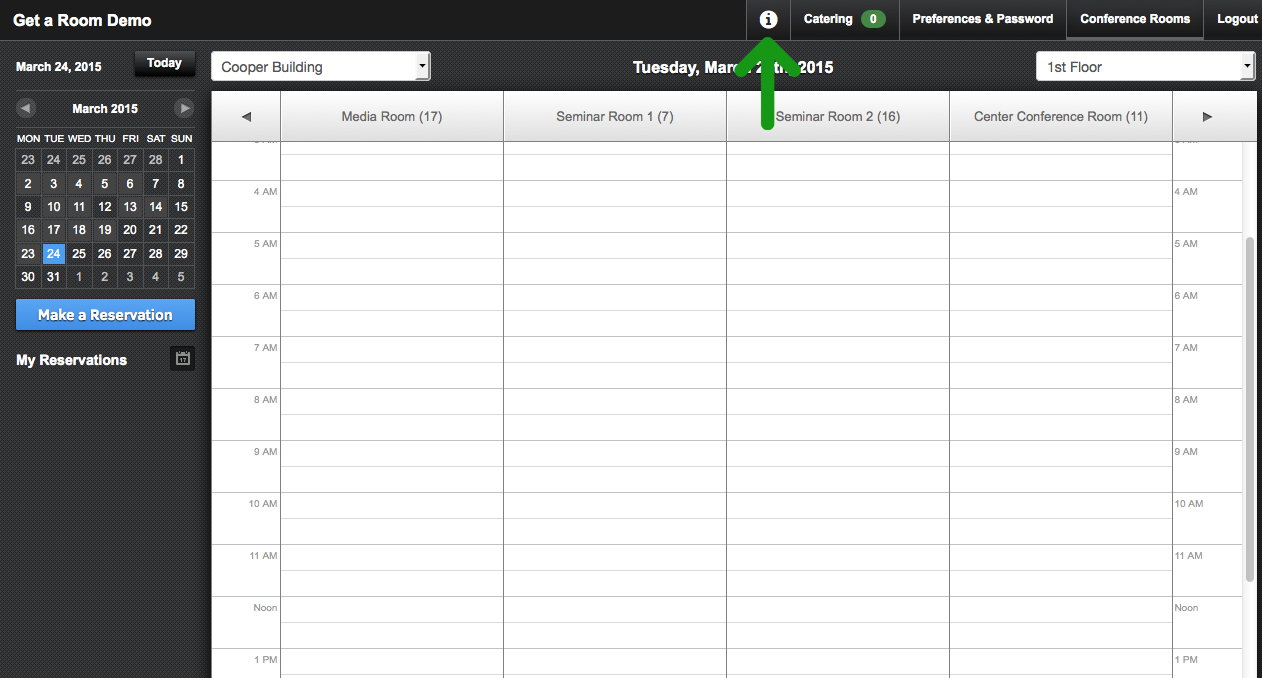
Get a Room includes a comprehensive list of shortcuts, which you can access by clicking the "i" icon in the top navigation, circled in this illustration.
Printing the Calendar
You can easily print the bookings by clicking "P" when on the calendar interface. This will bring you to a print friendly view of the calendar; on the right-hand side of this screen you'll see customization options for printing.
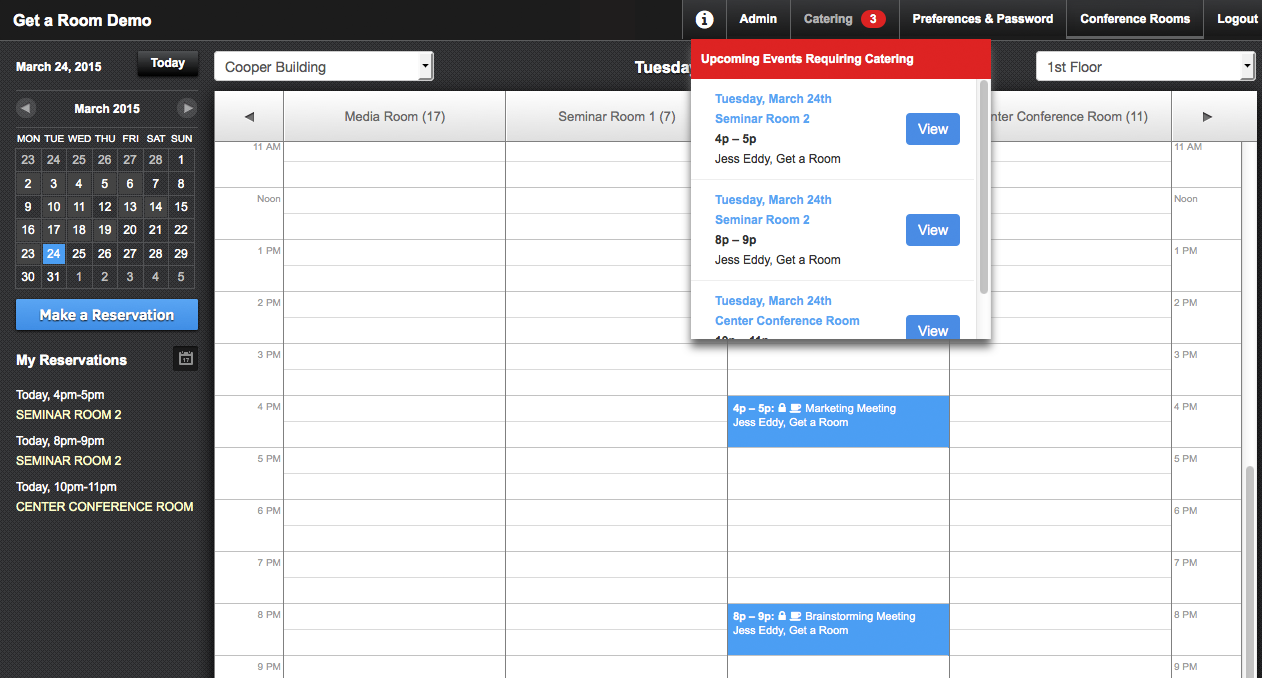
Catering Notifier
If you have the Catering module activated you can use the Catering notifier to see what upcoming bookings require catering. You can view the booking from this notifier drop-down by clicking the "View" button that is associated with the booking event.
Room Booking Modal
The room booking modal is very simple and be configured and customized to meet your needs.
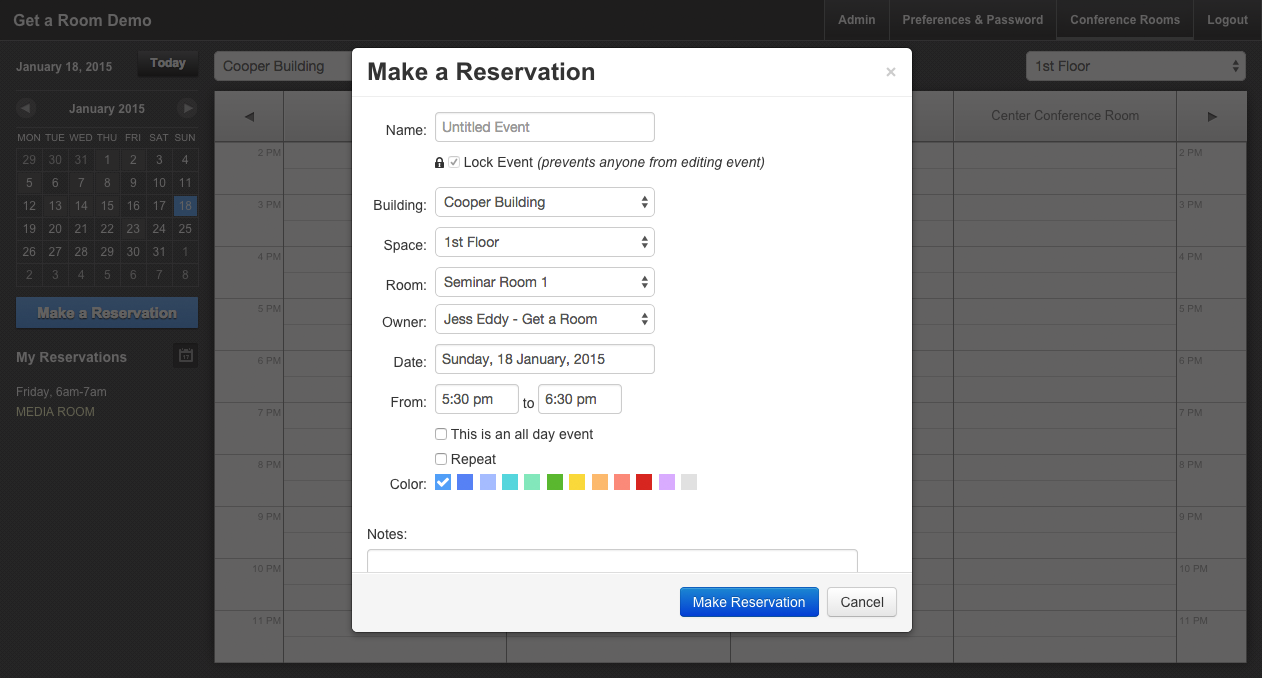
Name
The name or title of your room booking. This title shows up on the calendar and anyone can see it.
Lock Event
By default all bookings are locked meaning only the person who made the booking can edit or delete it (aside from Admins which can modify or delete any booking).
Building
If you have multiple buildings you can use this drop-down to choose the building in which you'd like to make a reservation in.
Space
If you have multiple floors or spaces you can use this drop-down to choose the floor in which you'd like to make a reservation in.
Room
Where you select the room you'd like to make the reservation in.
Owner
This is a feature that only Admins sees. This allows Admins to make room bookings on behalf of someone else. While it's not necessary that Admins assign ownership of a room booking to someone else, some companies like it for reporting purposes.
Date
Where you select the date of the room booking.
From
The from and to time of the room booking.
All Day Event
Users can check this if the booking is an all day event. This feature can be turned off if you do not want people booking all day events.
Repeat
For creating your booking as a repeat event.
Color
You can easily color code your bookings with colors.
Notes
Here you can include any notes or text.
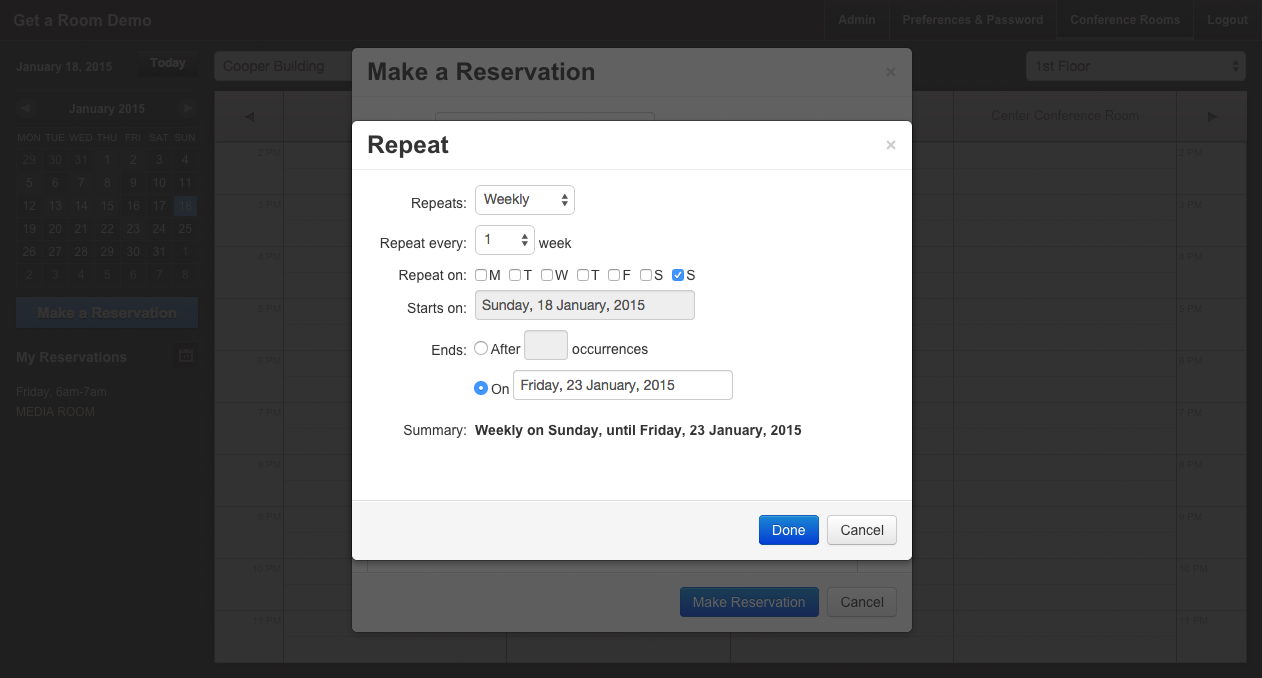
Modifying Repeat Events
Repeat Events allow you to create an event that repeats itself daily, weekly or monthly.
A repeat event will always show the repeat event icon in the daily event calendar view or when you hover over an event in the popover, as shown below:
event icon
Depending on how you edit an existing repeat event will determine how it updates the other repeat events in the series.
When you edit a repeat event but don't change the date
When you don't change the date of an existing repeat event instance, only the event details are changed (e.g. name, time, color, notes etc.). No dates will be changed in your repeat event series.
Update actions:
Modify Reservation > All Events
Get a Room will update all the repeat events in the series with the new event details. No dates will be changed.
Modify Reservation > Following Events
Get a Room will only update all the future events with the new event details. No dates will be changed.
Modify Reservation > Only this event
Get a Room will only update the selected event's details. No dates will be changed.
When you edit a repeat event and change the date
When you do change the date of an existing repeat event instance, the event details are changed (e.g. name, time, color, notes etc.) but the dates of the events can also change.
Update actions:
Modify Reservation > All Events
Get a Room will attempt to move all of the events to start from the newly selected date and then update all the repeat events with the new event details.
Modify Reservation > Following Events
Get a Room will update all the future events with the new event details first and will then attempt to move the selected event and all future events to the newly selected date - events before the selected event will remain unchanged.
Modify Reservation > Only this event
Get a Room will attempt to move the selected event to the newly selected date and then only update the selected event's details.